From photo to pattern: how one dress became a printable sewing pattern
process · digital review passed · not sewnThis is the step-by-step record of one dress, the red gingham button-front mini: what the photo showed, where the first reading went wrong, and how it became a drawing, a four-piece pattern and four printable PDFs. Every picture below is a real file published with this dress.
One thing first: the workshop on this site does not read your own photos yet. This page shows how one pattern was made, partly by hand. What the workshop does today
- The photo: what it showed, and what it could not
- The first reading was wrong and was corrected by hand
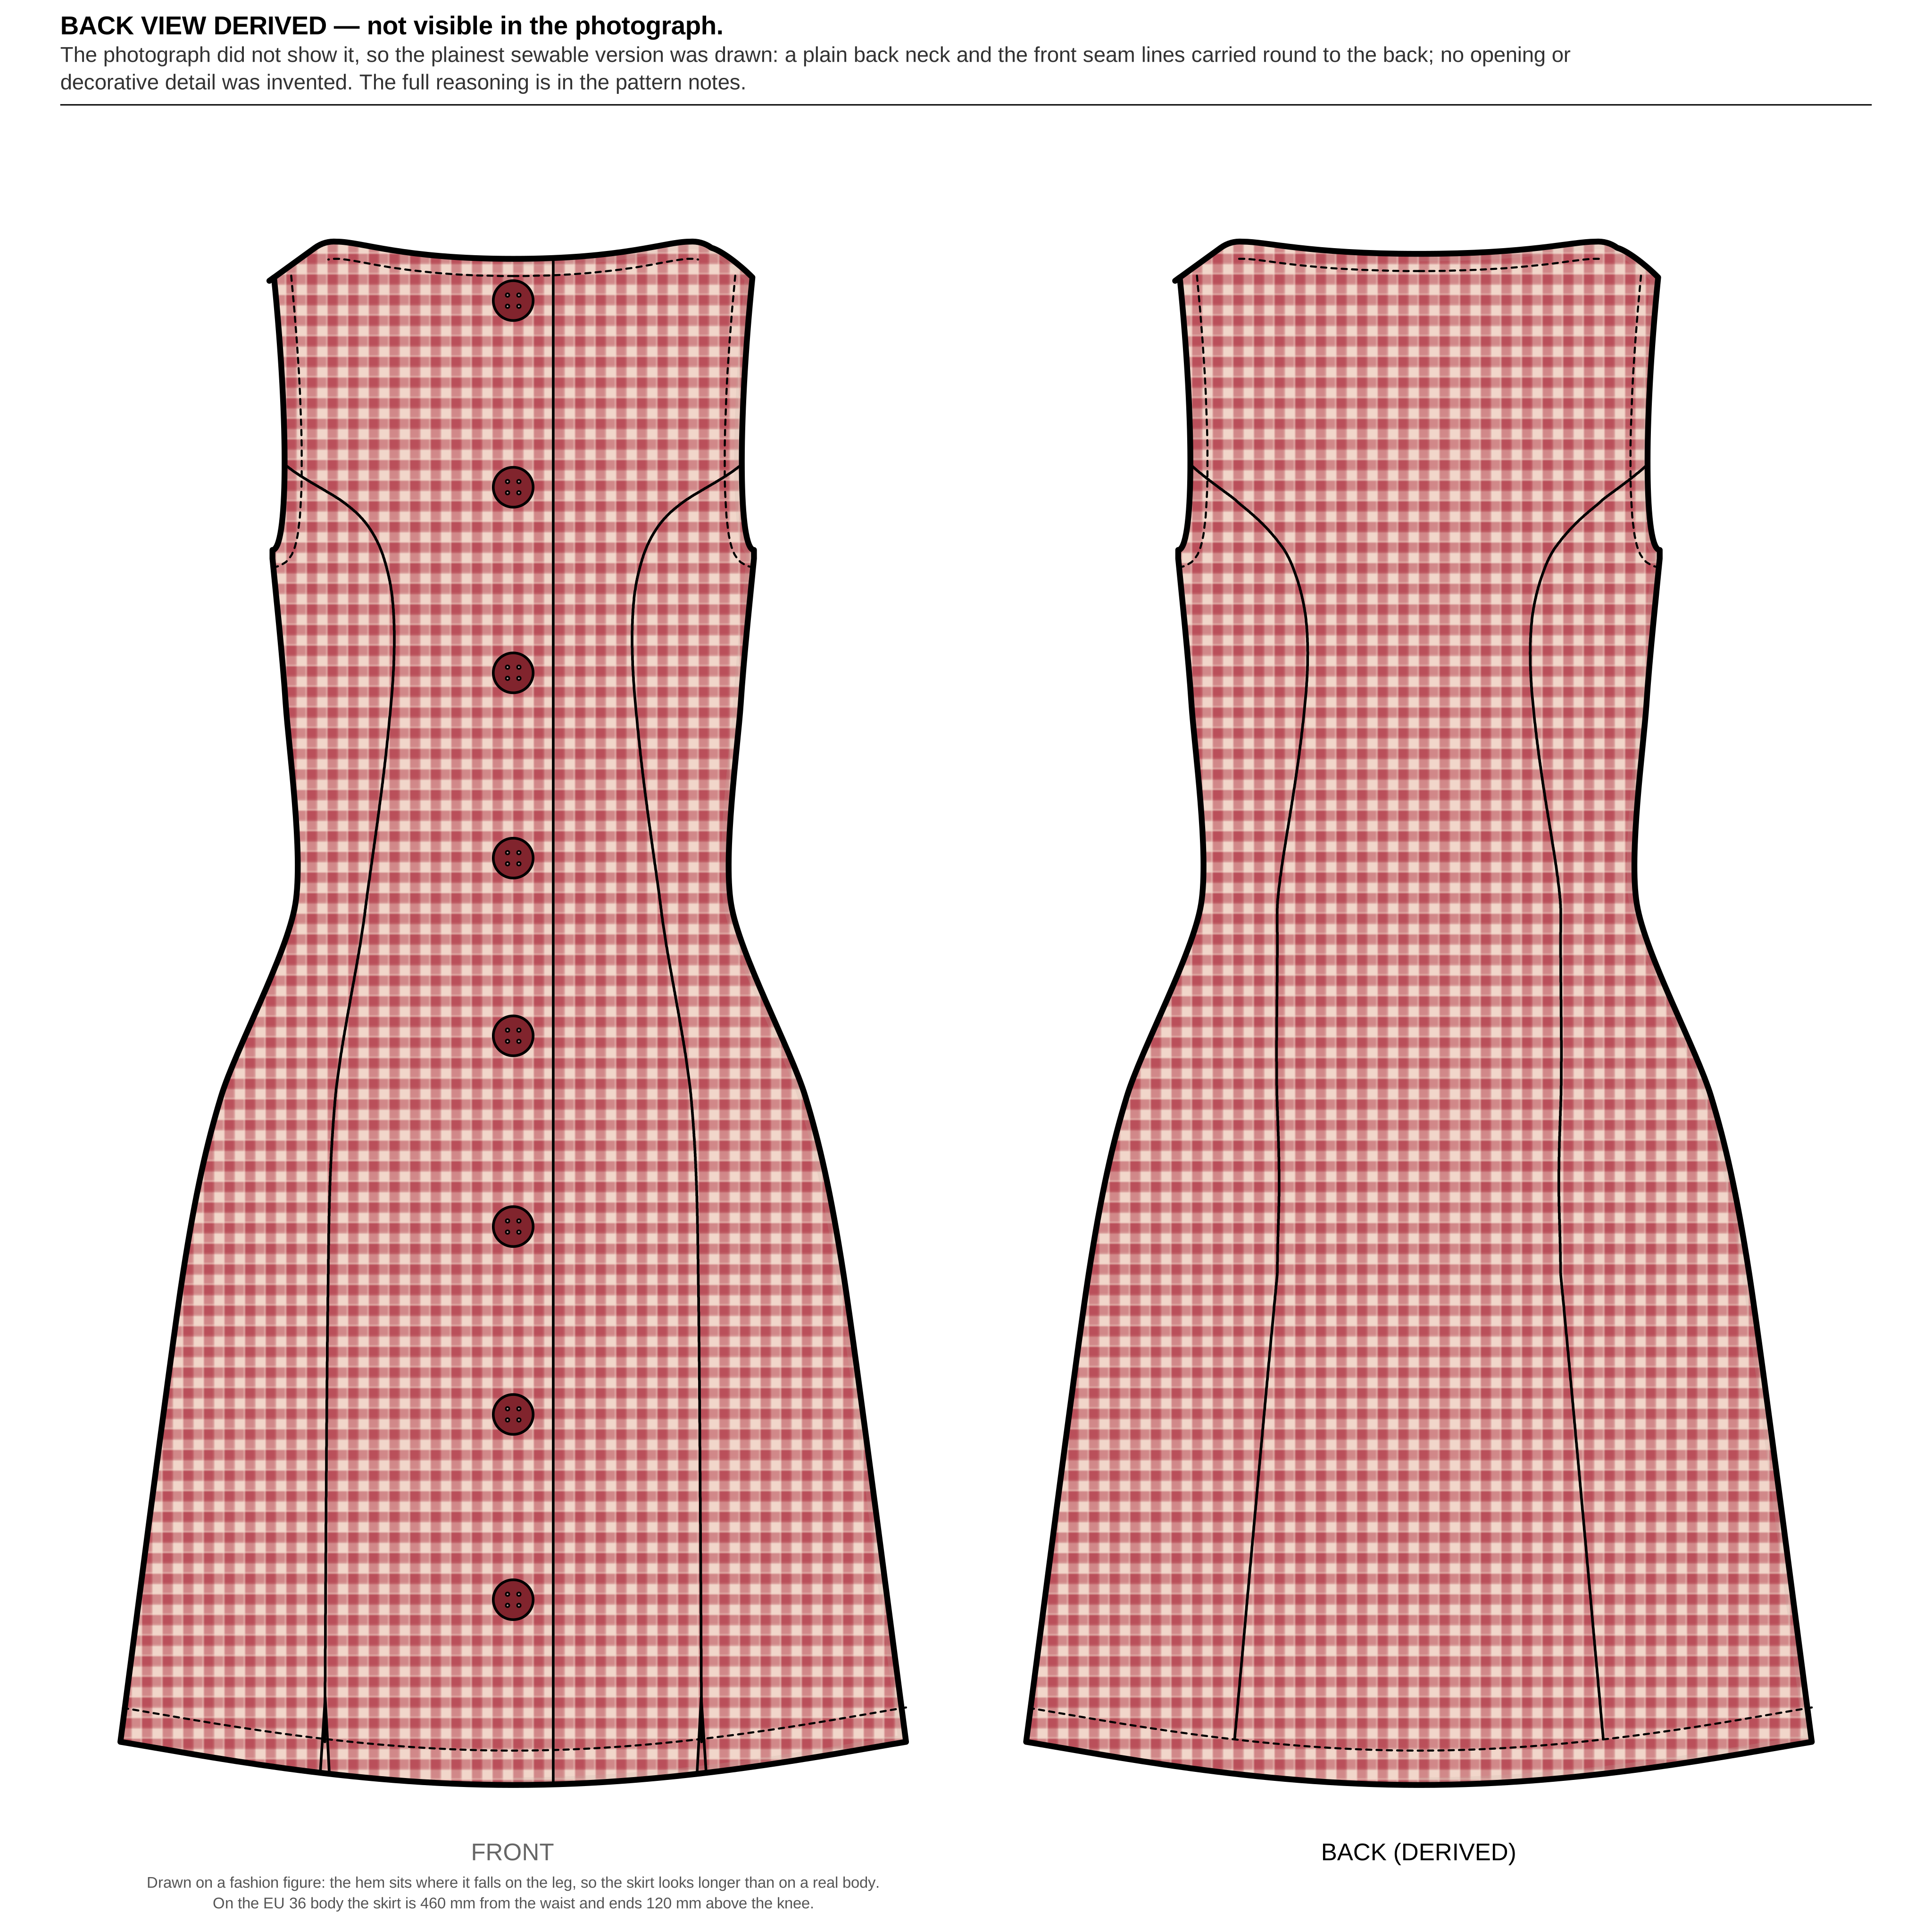
- The technical drawing
- The cutting pattern: four pieces
- The printable package: four PDFs
- The review: what was checked, and what was not
1. The photo: what it showed, and what it could not
The pattern started from one photo of the dress. The photo is not shown here: it is not ours to publish, so this step is told in words.
What it showed: red and white gingham, no sleeves, a high, wide boat neck, princess seams from the armholes to the hem, no waist seam, a short A-line skirt, eight buttons down the front and a small slit at the hem of each front princess seam. The neck and armhole edges look clean, with no binding showing.
The checks themselves worked as a ruler: lengths were counted in checks, not in pixels, and where the hem falls was read against the wrist of the hanging arm.
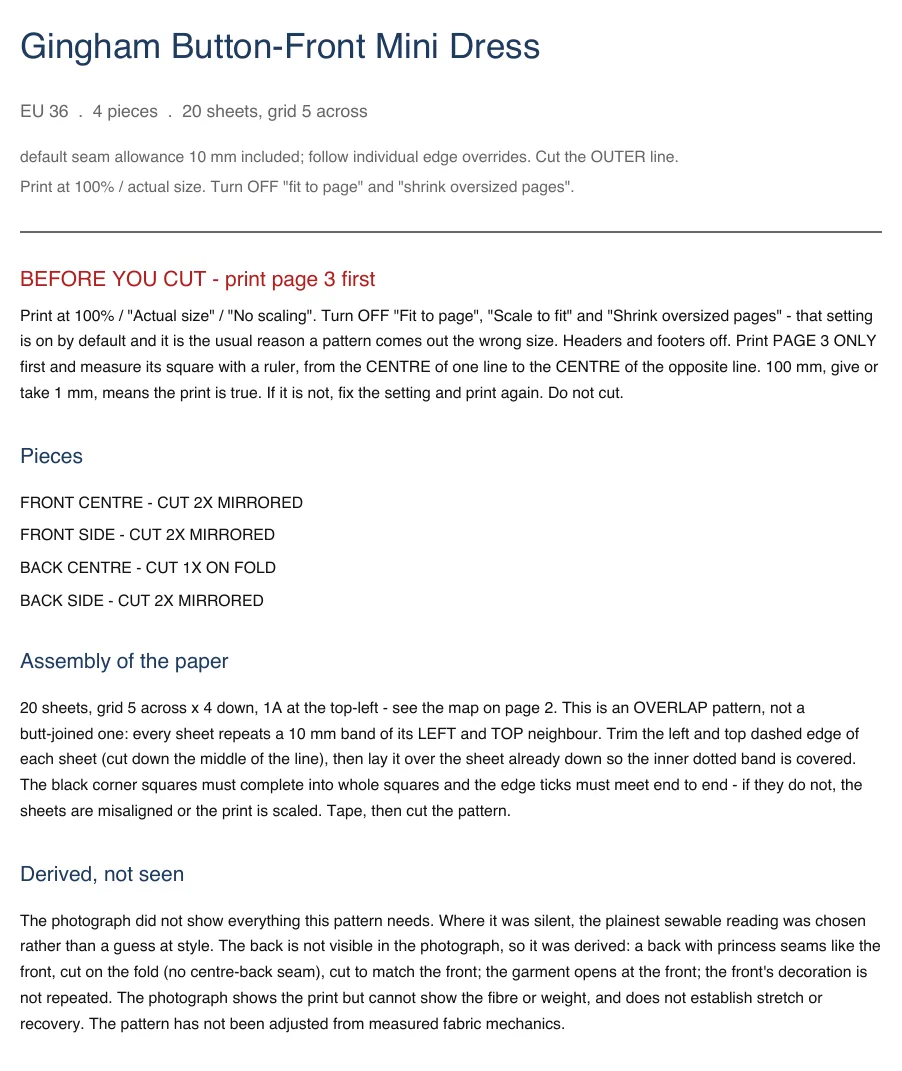
What it could not show, in the words printed on page 1 of the A4 pattern:
“The photograph did not show everything this pattern needs. Where it was silent, the plainest sewable reading was chosen rather than a guess at style. The back is not visible in the photograph, so it was derived. […] The photograph shows the print but cannot show the fibre or weight, and does not establish stretch or recovery.”
So three things are assumptions, not readings: the back, the fabric (its weight, stretch and drape) and the exact skirt length. A belt seen in the photo is not part of this pattern.
2. The first reading was wrong and was corrected by hand
The first step turns the photo into a written reading: neckline, sleeves, seams and closures, with anything the photo cannot show written down as an assumption. For this dress, the first automatic reading described another dress. It was corrected by hand against the photo:
- Neckline. First reading: a U-neck. Corrected: a high, wide boat neck.
- Buttons. First reading: a slanted row. Corrected: eight dark red buttons down the centre front.
- Shape. First reading: an hourglass. Corrected: no waist seam, flaring into a short A-line.
- Seams. First reading: no princess seams and no slits. Corrected: princess seams from the armholes, each front one left open at the hem as a small slit.
The pattern made from the corrected reading was then reviewed nine times. The first eight reviews sent it back; the ninth accepted it as a digital pattern, with fitting left as a separate step. Some of what the reviews and new measurements caught:
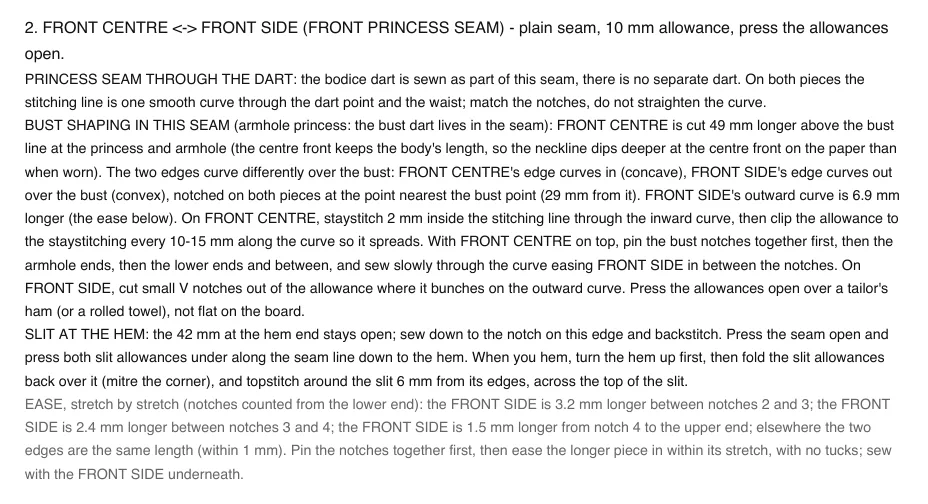
- Bust shaping in the wrong place: the princess seam passed 6 cm outside the bust point. Now its nearest point is 29 mm from the bust point (sewing guide, step 2).
- Skirt length: the first scale came from the torso and gave a 554 mm skirt, ending 26 mm above the knee. Read against the wrist of the hanging arm, the skirt is 460 mm, ending 12 cm above the knee.
- Check size: the drawing showed the checks 23% too small, 31 across the bust where the photo has 24. Now it shows 24.
- Edge finish: the neck and armholes were wrapped in 5 mm ready-made bias binding, which would show from outside, while the photo shows a clean edge. Now a bias strip is sewn to the edge and turned fully inside, so only the topstitching shows.
Every fix went into the shared pattern engine, not into this one file.
3. The technical drawing
The drawing and the pattern come from the same corrected reading. The front follows the photo. The back is derived: the photo did not show it, so the plainest sewable version was drawn, with a plain back neck and the front seam lines carried round to the back. No opening or decoration was invented.
4. The cutting pattern: four pieces
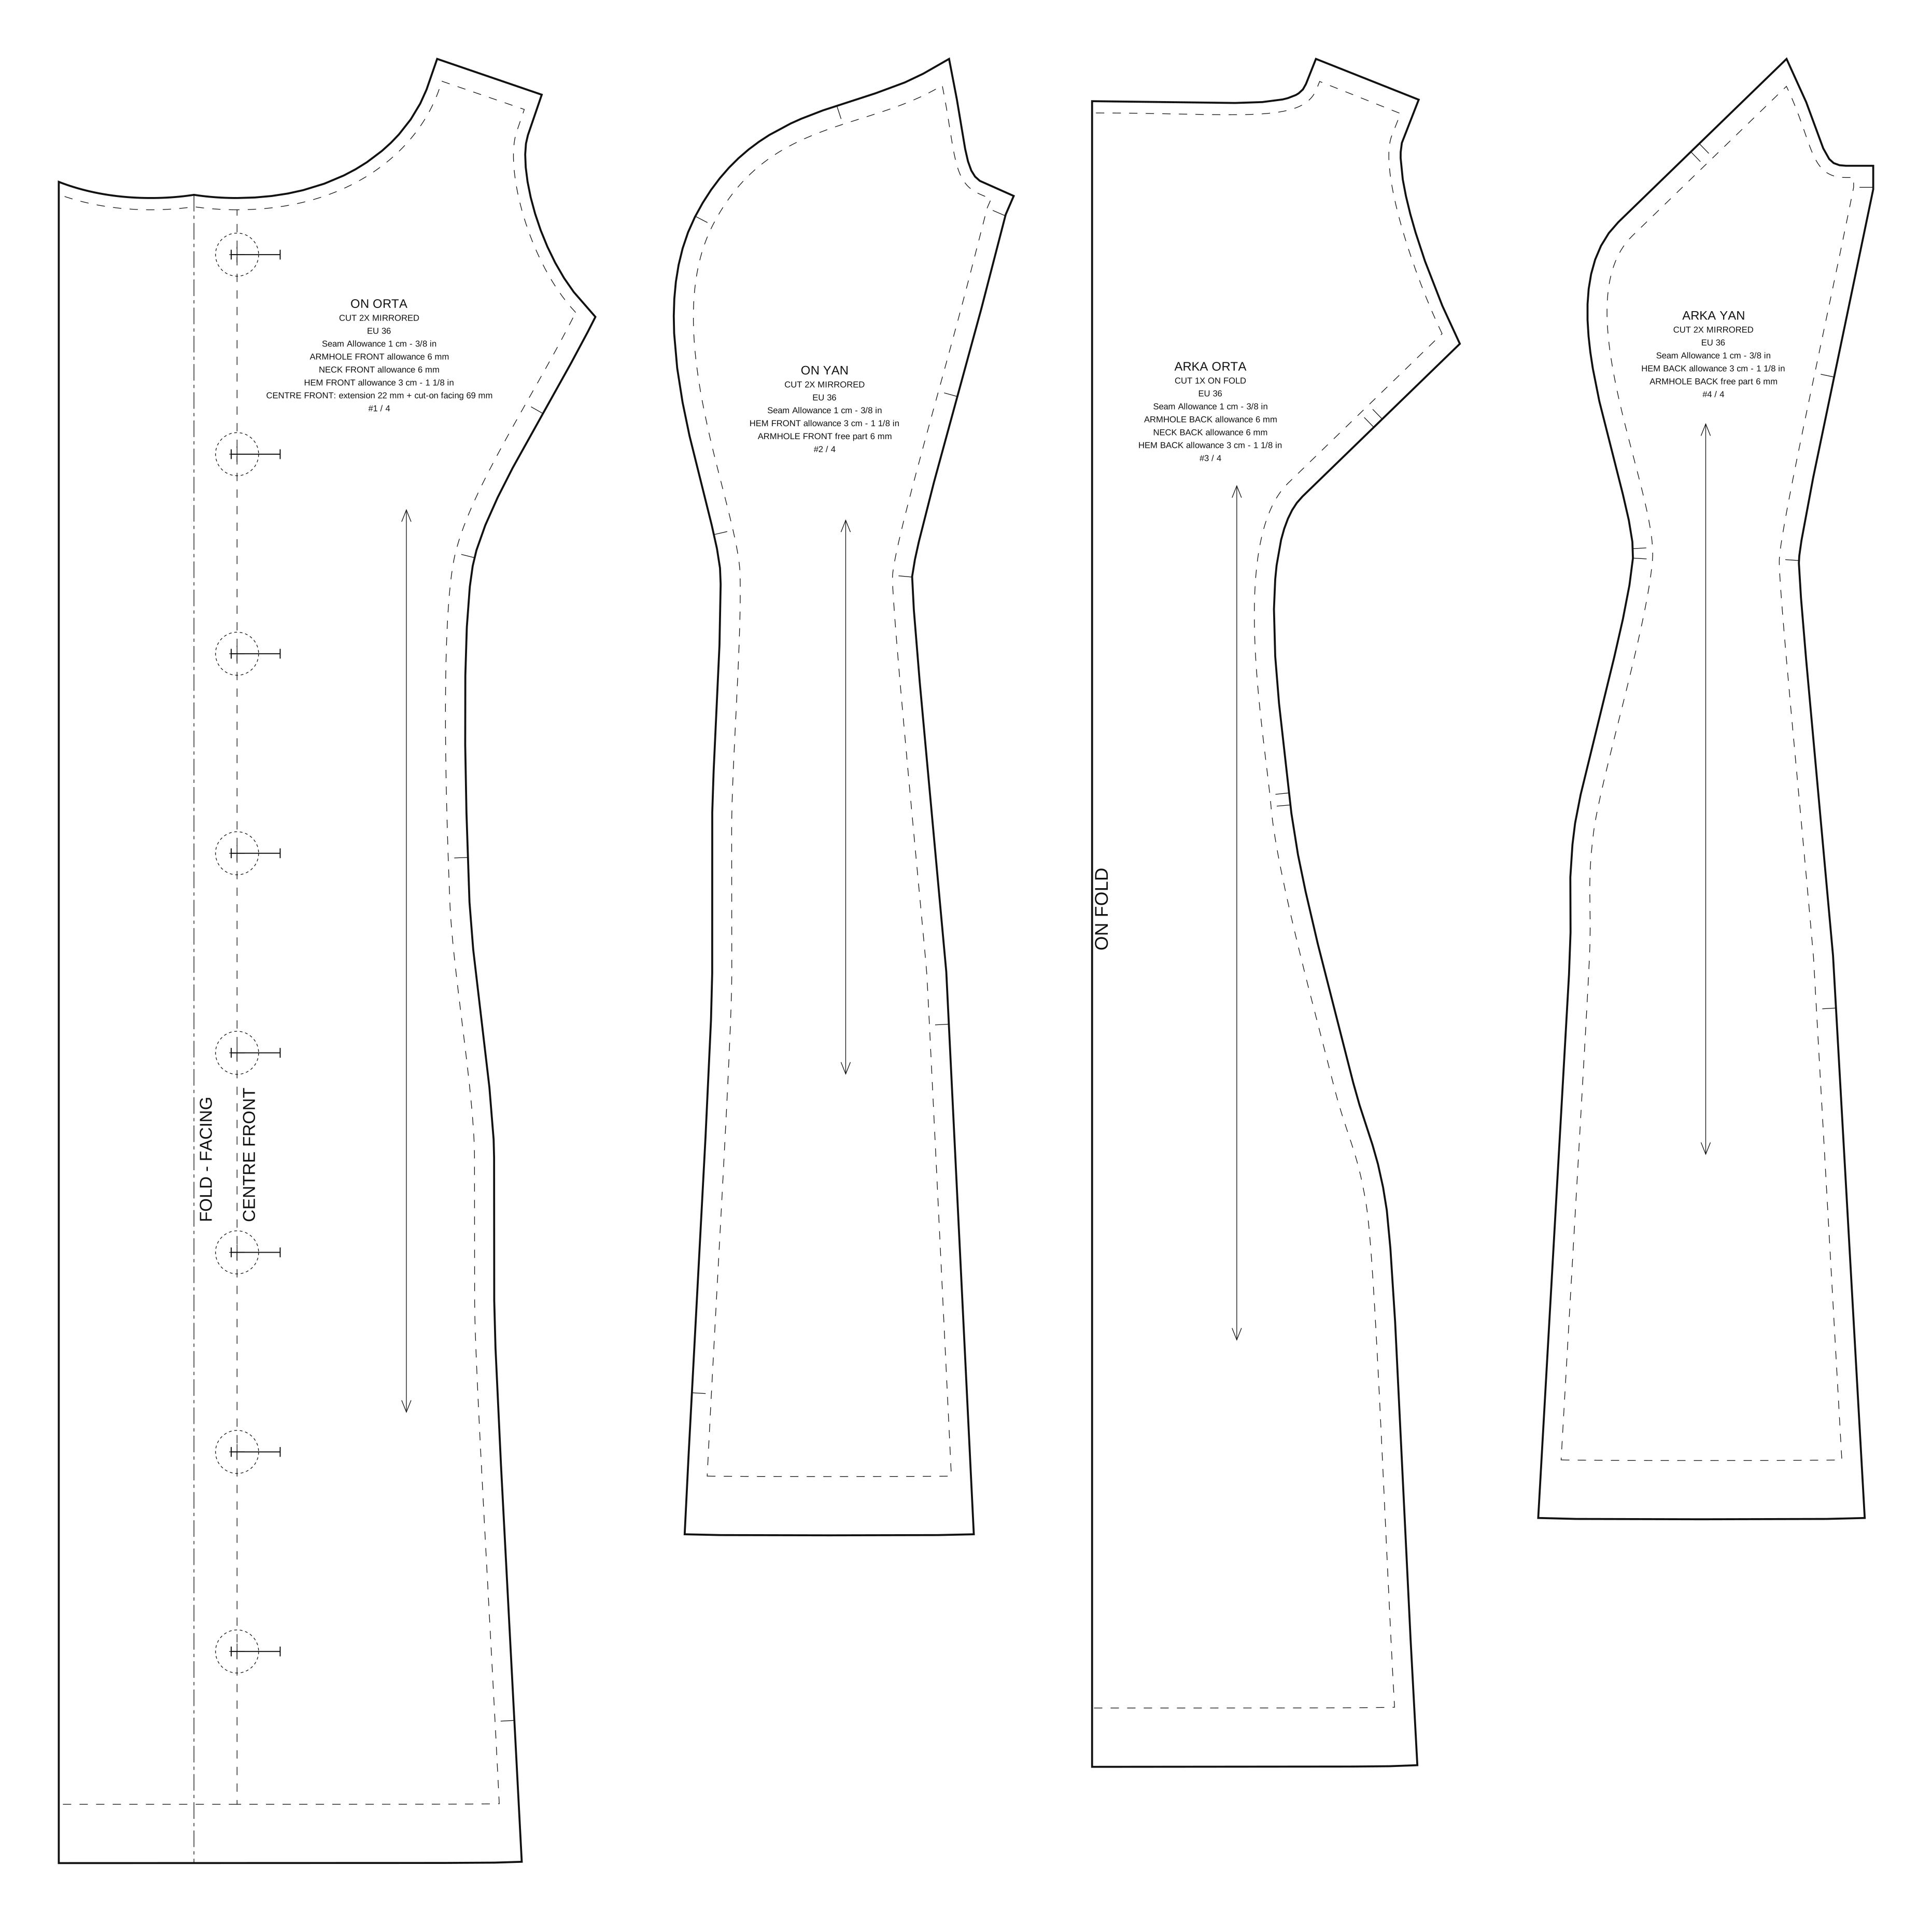
The same reading becomes the real cutting pattern, here in size EU36 (body: bust 84 cm, waist 66 cm, hip 90 cm). It has four pieces:
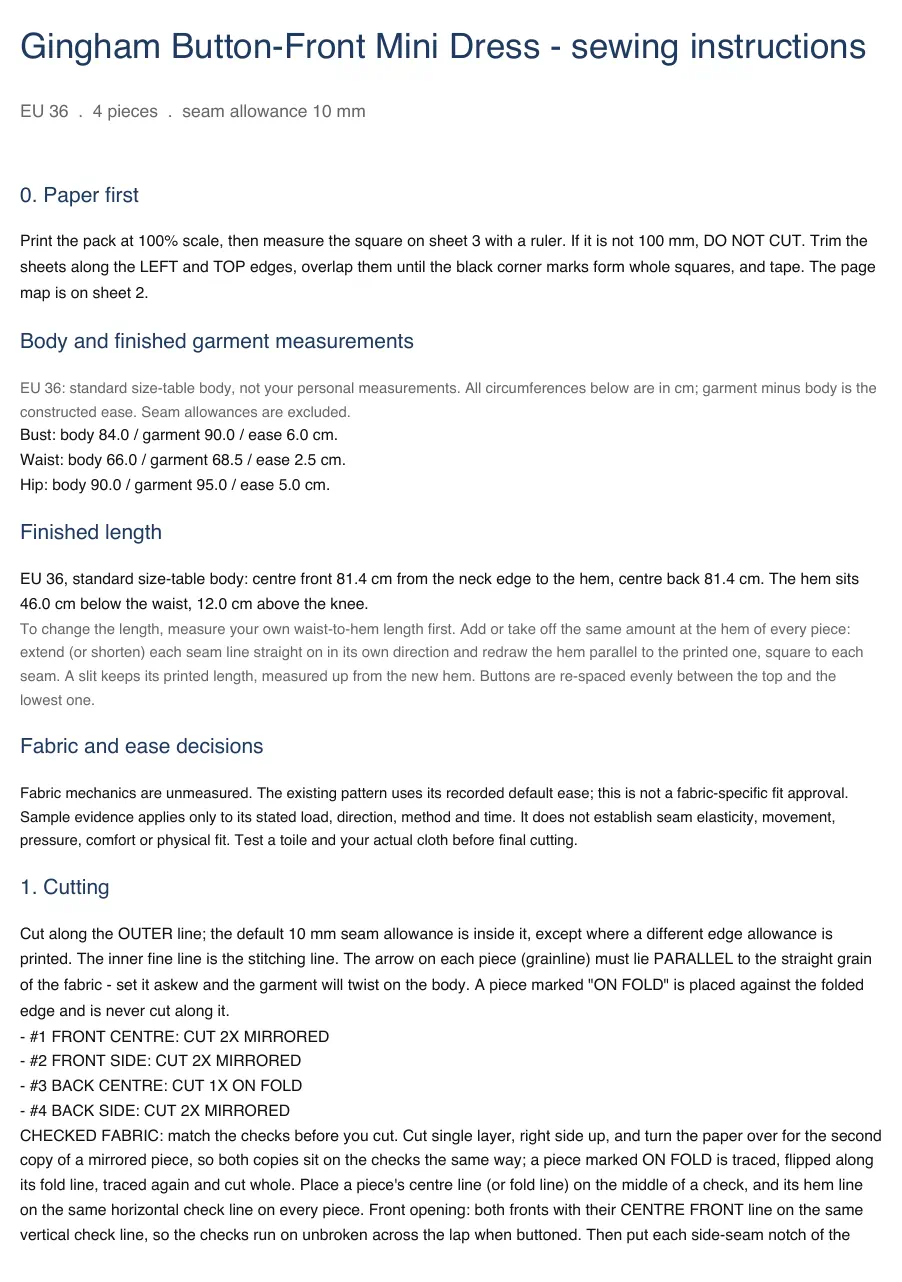
- Front centre, cut 2 mirrored. The button lap (22 mm) and the facing (69 mm) are cut in one with it, and it carries the eight button marks.
- Front side, cut 2 mirrored.
- Back centre, cut 1 on the fold, so there is no centre-back seam.
- Back side, cut 2 mirrored.
The seam allowance is 1 cm, except 6 mm at the neck and armholes and 3 cm at the hem. The bust shaping sits inside the front princess seam, so there is no separate dart.
5. The printable package: four PDFs
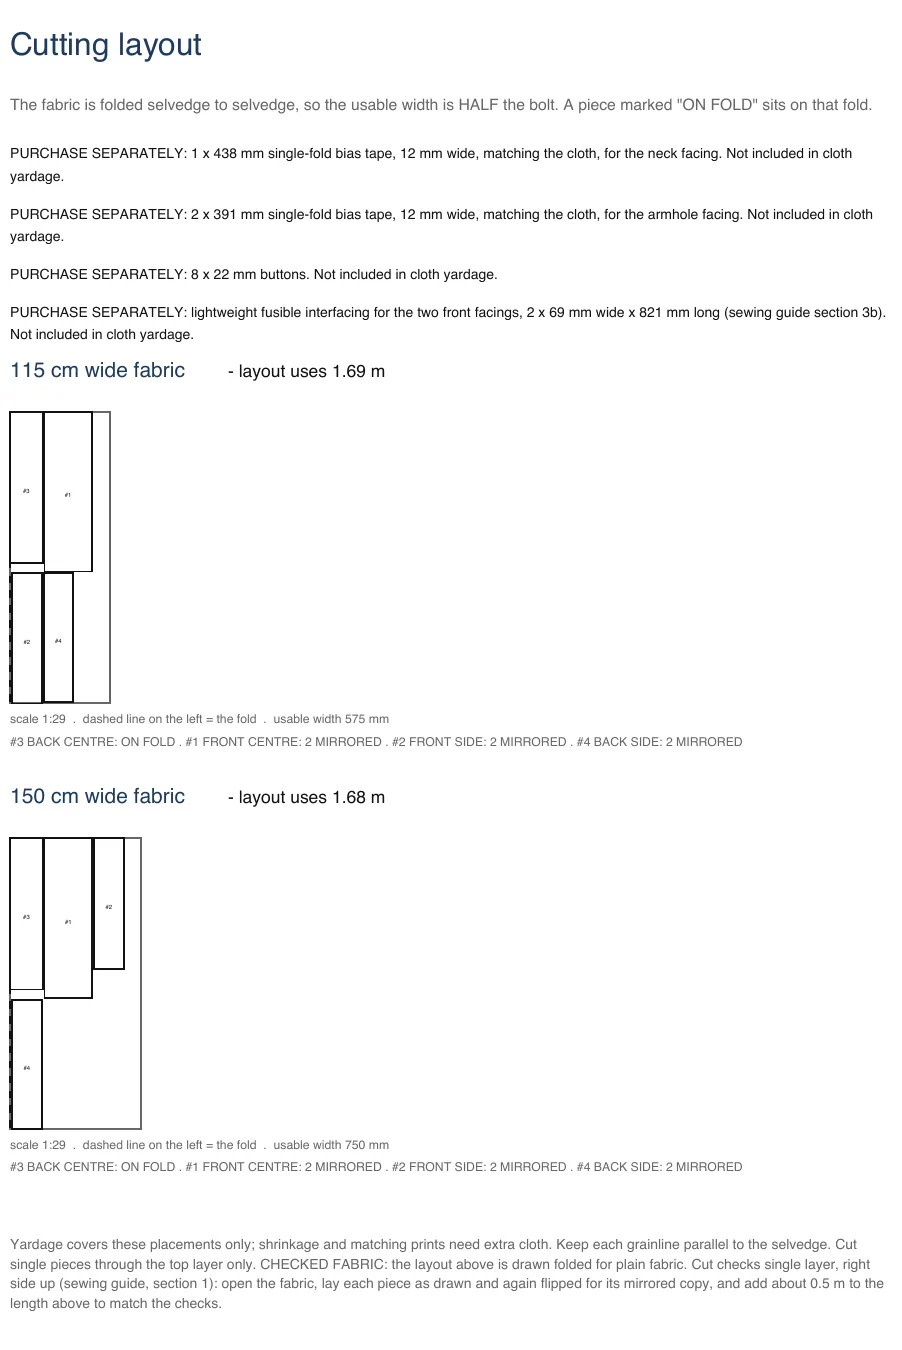
The pattern is printed into four files: the pattern for home printing (A4, 23 pages), the same pattern for a copy shop (two A0 sheets), a sewing guide (A4, 6 pages) and a cutting layout (A4, 1 page). Here are the pages that show what each A4 file holds.
6. The review: what was checked, and what was not
Checked digitally:
- The pattern passed a digital review on 4 October, in the ninth round.
- On 10 October it was checked again after later shared engine fixes: the largest change was 1.7 mm, and the side seams below the waist moved out by at most 0.55 mm. The accepted measurements still hold.
- On 10 October the same pattern was generated in the browser in sizes EU34 to EU44, and the engine's sewability check reported no errors. Only EU36 is offered as a download.
- The neck and armholes leave the shoulder at a right angle, and the hem meets every seam at a right angle, so no point or notch forms where the edges join.
Not checked
- The dress has not been sewn or fitted.
- The fabric's stretch and drape were not measured, so the ease is the pattern's default.
- The back and the skirt length are assumptions (step 1).
- How the hip shaping is shared between front and back is an engine default not yet tested on a body.
So sew a toile in inexpensive fabric before cutting your final fabric, and check there how the armhole sits and how the hip shaping is shared between front and back.
Step-by-step help: make a toile · check the size · print at true scale · download the EU36 package
Can the workshop do this with my photo?
Not yet. The workshop on this site generates one example design in your browser, with its drawing, pattern and four PDFs, and saves it to the wardrobe on this device. Designing from your own photo or words is not open yet.
← All journal stories